Warning: preg_match(): Compilation failed: unrecognized character follows \ at offset 1 in /home/r5652521/public_html/soma-engineering.com/wp-content/themes/affinger/functions.php on line 1548
Warning: preg_match(): Compilation failed: unrecognized character follows \ at offset 1 in /home/r5652521/public_html/soma-engineering.com/wp-content/themes/affinger/functions.php on line 1548
Warning: preg_match(): Compilation failed: unrecognized character follows \ at offset 1 in /home/r5652521/public_html/soma-engineering.com/wp-content/themes/affinger/functions.php on line 1548
Warning: preg_match(): Compilation failed: unrecognized character follows \ at offset 1 in /home/r5652521/public_html/soma-engineering.com/wp-content/themes/affinger/functions.php on line 1548
Warning: preg_match(): Compilation failed: unrecognized character follows \ at offset 1 in /home/r5652521/public_html/soma-engineering.com/wp-content/themes/affinger/functions.php on line 1548
こんにちは!
Azure PowerShell から AzureVM (仮想マシン)をデプロイしてみました。
Azure ポータルの Web サイトに接続して、仮想マシンデプロイしなくても、管理端末から直接デプロイできるので便利かと思います。
参考にしたサイト
New-Azure
https://docs.microsoft.com/en-us/powershell/module/azurerm.compute/new-azurermvm?view=azurermps-6.1.0 | Microsoft Azure
概要
通常、Azure ポータルから 1 から手動で仮想マシンをデプロイする場合は、一般的には以下の手順になるかと思います。
- Azure ポータルの Web サイトに接続
- Azure Market Place から デプロイする仮想マシンを選択
- GUI でウィザードに沿って、項目に入力したり選択
- 仮想マシンをデプロイ
以下、実際にデプロイしてみた記事がありますので参考までにリンクを貼りました。
【Azure】仮想マシンを作成する ← Windows Server 2016 です。
上記のように Azure ポータルに接続して仮想マシンをデプロイするのではなく、管理端末からデプロイしたい場合があるかと思います。
ここでは、Windows Server 2016 DataCentre の仮想マシンを、Azure PowerShell でデプロイしてみます。
この記事の主な内容
こんな事が覚えられるかと思います。
- Azure PowerShell から仮想マシンをデプロイする流れ
- Azure PowerShell のコマンドレット(デプロイ向け)
Azure PowerShell のコマンドレット
Get-Credential コマンドレット
仮想マシンで使うローカル管理者のクレデンシャルを設定します。
仮想マシンがデプロイされた後に設定したクレデンシャルでサインインします。
New-AzureRmVm コマンドレット
PowerShell で Azure に 仮想マシンを構成 → デプロイする為に使われます。
Azure PowerShell で仮想マシンをデプロイする
下準備
1. Azure ポータルに接続します。
|
1 2 3 4 |
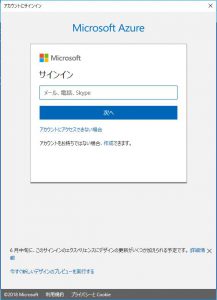
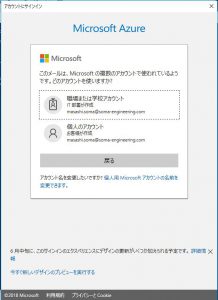
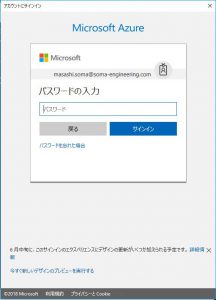
Connect-AzureRmAccount # 実行結果、以下の認証ウィンドウが表示されます。 |
|
1 2 3 4 5 6 7 8 |
Connect-AzureRmAccount # 認証結果 Account : masashi.soma@soma-engineering.com.testrs.jp SubscriptionName : 従量課金 SubscriptionId : 消してます TenantId : 消してます Environment : AzureCloud |
2. サブスクリプション確認します。サブスクリプションが複数ある場合は複数表示されます。
|
1 2 3 4 5 6 7 8 |
Get-AzureRmSubscription # 実行結果 Name : Azure Pass Id : 消してます TenantId : 消してます State : Enabled |
3. サブスクリプションを変数 $subscr に代入します。
|
1 2 3 4 5 |
$subscr = Get-AzureRmSubscription # 実行結果 特に画面には表示されないのでエラーが表示されなければ良しとします。 |
4. Get-Credential コマンドレットで取得したクレデンシャルの値を $cred 変数に代入します。
|
1 2 3 4 5 6 7 8 |
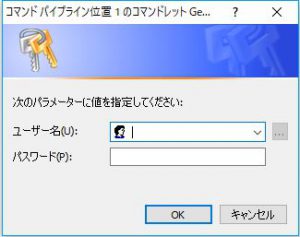
$cred = Get-Credenatial # 実行結果 コマンド パイプライン位置 1 のコマンドレット Get-Credential 次のパラメーターに値を指定してください: 実行すると、クレデンシャルの入力画面が表示されます。 ローカル管理者のユーザー名とパスワードを入力します。 |
下準備はここまでとします。
簡易的な方法
1. New-AzureRmVM コマンドレットを使い、以下のように書いて実行します。これだけです。
|
1 2 3 4 5 6 7 8 9 10 11 12 13 14 15 16 17 18 19 20 21 22 |
New-AzureRmVM -Name TestLab -Credential $cred # 実行結果 警告: New-AzureRmVM: A property of the output of this cmdlet will change in an upcoming breaking change release. The StorageAccoun tType property for a DataDisk will return Standard_LRS and Premium_LRS # デプロイが完了しますと、以下が表示されます。 ResourceGroupName : TestLab Id : /subscriptions/.../resourceGroups/TestLab/providers/Microsoft.Compute/virtualMachines/TestLab VmId : 0101bd32-0c5b-4883-a315-922b6d24e8ee Name : TestLab Type : Microsoft.Compute/virtualMachines Location : japanwest Tags : {} HardwareProfile : {VmSize} NetworkProfile : {NetworkInterfaces} OSProfile : {ComputerName, AdminUsername, WindowsConfiguration, Secrets} ProvisioningState : Succeeded StorageProfile : {ImageReference, OsDisk, DataDisks} FullyQualifiedDomainName : testlab-093bee.japanwest.cloudapp.azure.com |
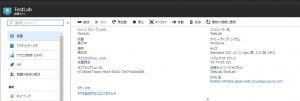
2. 仮想マシンがデプロイされているか、Azure ポータルで確認できました。
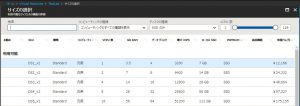
3. ちなみに仮想マシンのサイズは Standard DS1 v2 が自動で選択されるようです。最小構成ですかね。
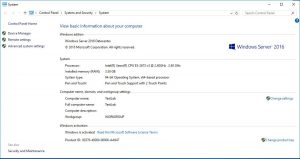
4. RDP でサーバーに接続してみました。
パラメーターを指定して実行する方法
コマンドレットで個々のパラメーターを設定してデプロイする方法になります。
以下、あくまでもサンプルですが書いてみました。流れとしては多分、こんなイメージだと思っていただければと思います。
言い訳かもしれませんが、未だ学習中という事もあり、かなり粗があると思います。
コマンドレットについては、以下の Microsoft のサイトで参考にしながら書けるかと思います。
コマンドレットによって設定するパラメーターが異なるかと思います。その辺を見ながら書く感じですかね。
コマンドレットの詳細は以下になります。(コマンドレットを Microsoft へのリンクにしてます。)
| コマンドレット | 説明 |
|---|---|
| New-AzureRmVMConfig | 仮想マシンの構成の作成します。 |
| Get-AzureRmResourceGroup | 使用中のサブスクリプションから Azure リソースグループを取得します。 |
| New-AzureRmVm | 指定したパラメーターを使い、仮想マシンを作成します。 |
| Set-AzureRmVMSourceImage | 仮想マシンのイメージを特定します。 |
VM Images(リンクをクリックすると別タブで開きます。)
https://docs.microsoft.com/en-us/powershell/module/azurerm.compute/?view=azurermps-6.1.0#vm_images | Microsoft Azure
|
1 2 3 4 5 6 7 8 9 10 11 12 13 14 15 16 17 18 19 20 21 22 23 24 25 26 27 28 29 30 31 32 33 34 35 36 37 38 39 40 41 42 43 44 45 46 47 48 49 50 51 52 53 54 |
$cred = Get-Credential $rgName = "TestLab" $location = "Japan East" $vmName = "labvm001" $vmSize = "Standard_DS2_v2" $pubName = "MicrosoftWindowsServer" $offer = "windowsserver" $skus = "2016-Datacenter" $ver = "latest" $VirtualMachine = New-AzureRmVMConfig -VMName $vmName -VMSize $vmSize try { Get-AzureRmResourceGroup -Name $rgName -Location $location -ErrorAction Stop Write-Host 'リソースグループは存在しています。デプロイは中断します。' -foregroundcolor red } catch { New-AzureRmVm -Name $rgName -Credential $cred -Location $location Set-AzureRmVMSourceImage -VM $VirtualMachine -PublisherName $pubName -Offer $offer -Skus $skus -Version $ver } # 実行結果 コマンド パイプライン位置 1 のコマンドレット Get-Credential 次のパラメーターに値を指定してください: 警告: New-AzureRmVMConfig: A property of the output of this cmdlet will change in an upcoming breaking change release. The StorageAccountType property for a DataDisk will return Standard_LRS and Premium_LRS 警告: New-AzureRmVM: A property of the output of this cmdlet will change in an upcoming breaking change release. The StorageAccountType property for a DataDisk will return Standard_LRS and Premium_LRS # デプロイ完了 ResourceGroupName : TestLab Id : /subscriptions/.../resourceGroups/TestLab/providers/Microsoft.Compute/virtualMachines/TestLab VmId : 719585c1-51bf-4812-bf01-48e0783cdaea Name : TestLab Type : Microsoft.Compute/virtualMachines Location : japaneast Tags : {} HardwareProfile : {VmSize} NetworkProfile : {NetworkInterfaces} OSProfile : {ComputerName, AdminUsername, WindowsConfiguration, Secrets} ProvisioningState : Succeeded StorageProfile : {ImageReference, OsDisk, DataDisks} FullyQualifiedDomainName : testlab-828088.Japan East.cloudapp.azure.com 警告: Set-AzureRmVMSourceImage: A property of the output of this cmdlet will change in an upcoming breaking change release. The StorageAccountType property for a DataDisk will return Standard_LRS and Premium_LRS Name : labvm001 HardwareProfile : {VmSize} StorageProfile : {ImageReference} |
以上になります。
いかがでしょうか。このような形で仮想マシンを Azure PowerShell から展開する事に慣れると便利ですね。
どの構成にするかによって使うコマンドレットが異なるように見えるので、その編は使いながら覚えていくようにしたいと思います。
(仕事で使った事がないので、完全に遊びになってます。デプロイしたままにしておくと料金が加算されるので作ったら消すの繰り返しです。汗; )
では最後までお読みいただきありがとうございました!
おすすめの本はこちら ↓↓↓
