Warning: preg_match(): Compilation failed: unrecognized character follows \ at offset 1 in /home/r5652521/public_html/soma-engineering.com/wp-content/themes/affinger/functions.php on line 1548
Warning: preg_match(): Compilation failed: unrecognized character follows \ at offset 1 in /home/r5652521/public_html/soma-engineering.com/wp-content/themes/affinger/functions.php on line 1548
Warning: preg_match(): Compilation failed: unrecognized character follows \ at offset 1 in /home/r5652521/public_html/soma-engineering.com/wp-content/themes/affinger/functions.php on line 1548
Warning: preg_match(): Compilation failed: unrecognized character follows \ at offset 1 in /home/r5652521/public_html/soma-engineering.com/wp-content/themes/affinger/functions.php on line 1548
Warning: preg_match(): Compilation failed: unrecognized character follows \ at offset 1 in /home/r5652521/public_html/soma-engineering.com/wp-content/themes/affinger/functions.php on line 1548
Warning: preg_match(): Compilation failed: unrecognized character follows \ at offset 1 in /home/r5652521/public_html/soma-engineering.com/wp-content/themes/affinger/functions.php on line 1548
こんにちは!
AzureVM(仮想マシン)の VM サイズを Azure PowerShell で変更してみました。
ここでは、既にデプロイしたある仮想マシンに対して、VM サイズを変更します。
まずは VM サイズの種類から見てゆきましょう。
VM サイズの種類
Microsoft Azure では、仮想マシンの種類が予め決められており、種類によって性能が異なります。
以下のように、目的別に種類が分かれており、種類の中にサイズがあって、細分化されているイメージです。
ユーザーは、目的別に応じて仮想マシンの種類とサイズを選び、デプロイします。
Azure の Windows 仮想マシンのサイズ | Microsoft Azure
※以下の画像は、上記 URL から切り取って貼り付けたものになります。(2018年6月4日時点)
ロケーションで使用可能な VM サイズ
仮想マシンを使っているロケーションで、どの種類の VM サイズが使用可能なのか、Azure PowerShell で確認する事ができます。
例えば、私の場合、仮想マシンは米国東部 (eastus) 上で実行中でありますが、使用可能な VM サイズを確認するには以下のコマンドを実行します。
構文:Get-AzureRmVMSize -Location "ロケーション名"
Get-Azure
|
1 2 3 4 5 6 7 8 9 10 11 12 13 |
Get-AzureRmVMSize -Location "eastus" # 実行結果 Name NumberOfCores MemoryInMB MaxDataDiskCount OSDiskSizeInMB ResourceDiskSizeInMB ---- ------------- ---------- ---------------- -------------- -------------------- ... Standard_DS1_v2 1 3584 4 1047552 7168 Standard_DS2_v2 2 7168 8 1047552 14336 Standard_DS3_v2 4 14336 16 1047552 28672 Standard_DS4_v2 8 28672 32 1047552 57344 Standard_DS5_v2 16 57344 64 1047552 114688 ... |
事前準備
- Azure PowerShell で Azure Portal に接続済みである事。
方法は以下の記事を参考にしていただければ幸いです。
【Azure】Azure PowerShellでAzureに接続する
注意事項
仮想マシンの VM サイズの変更は、仮想マシンの状態が Azure Portal 上で停止、実行中のいずれも可能なようです。
しかしここで注意が必要なのですが、仮想マシンが起動中(実行中)のまま VM サイズの変更をしますと、仮想マシンが再起動します。
ですので基本的には、VM サイズ変更は Azure Portal から停止の操作を行い、停止済み(割り当て解除)の状態にする事をおすすめします。
またこの案内は、Microsoft で推奨されています。他にも気になる事が色々書いてありますので参考になります。
VM のサイズ変更について | Japan Azure IaaS Support Blog
VM サイズを変更する
では早速 VM サイズを変更します。
- 変更前の VM サイズ:Standard_D2_V3
- 変更後の VM サイズ:Standard_D4_V3
使用中の VM サイズを確認する
Azure Portal から確認してみます。Standard D2 v3 になっています。
Azure PowerShell で使用中の VM サイズを確認できます。以下の Azure PowerShell を実行します。
|
1 2 3 4 5 6 7 8 9 10 11 |
$size = (Get-AzureRmVM -ResourceGroupName "TestLab" -Name "labvm01").HardwareProfile.VMSize Get-AzureRmVMSize -location "eastus" | ?{ $_.name -eq $size } # 実行結果 警告: Get-AzureRmVM: A property of the output of this cmdlet will change in an upcoming breaking change release. The StorageAccountType property for a DataDisk will return Standard_LRS and Premium_LRS Name NumberOfCores MemoryInMB MaxDataDiskCount OSDiskSizeInMB ResourceDiskSizeInMB ---- ------------- ---------- ---------------- -------------- -------------------- Standard_D2_v3 2 8192 4 1047552 51200 |
仮想マシンを停止する
使用中の VM サイズを確認しましたら、仮想マシンを停止(割り当て解除)します。
Azure Portal からではなく、AzurePowerSell で行います。
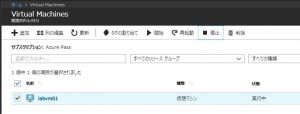
Azure Portal 上では実行中だと、以下のステータスが表示されています。
これが停止(割り当て解除)しますと、以下のステータスが表示されています。
|
1 2 3 4 5 6 7 8 9 |
Stop-AzureRmVM -ResourceGroupName "TestLab" -Name "labvm01" -Force # 実行結果 OperationId : Status : StartTime : EndTime : Error : |
仮想マシンの状態を確認する
仮想マシンが正常に停止されたか、以下の方法で確認します。
Get-AzureRmVm コマンドレット で仮想マシンの状態を取得し、変数 VMStat に代入します。
状態は配列として Statuses の 2 番目に表示されるので、[1] を指定します。これを #VMPwStat に代入します。
最後に Write-Host でコンソールに状態を出力します。
|
1 2 3 4 5 6 7 8 |
$VMStat = Get-AzureRmVM -ResourceGroupName "TestLab" -Name "labvm01" -Status $VMPwStat = $VMStat.Statuses[1].DisplayStatus Write-Host $VMPwStat # 実行結果 VM deallocated ← VM deallocated が停止(割り当て解除)の状態になります。 |
仮想マシンの VM サイズを変更する
ここまで少し長かったですが、これから VM サイズを変更します。
Get-AzureRmVm コマンドレットを使用し、仮想マシンを取得し変数 $vm に代入します。
|
1 2 3 4 5 6 |
$vm = Get-AzureRmVm -ResourceGroupName "TestLab" -VMName "labvm01" # 実行結果(警告以外に何も表示されなければ OK です。) 警告: Get-AzureRmVM: A property of the output of this cmdlet will change in an upcoming breaking change release. The StorageAccountType property for a DataDisk will return Standard_LRS and Premium_LRS |
次に、変数 $vm を使用し、VM サイズを変更します。
|
1 2 3 4 5 6 7 |
$vm.HardwareProfile.VmSize = "Standard_D4_V3" # 実行結果 RequestId IsSuccessStatusCode StatusCode ReasonPhrase --------- ------------------- ---------- ------------ True OK OK |
仮想マシンの VM サイズを変更されたか確認する
最後に、VM サイズが変更されたかどうか確認します。以下は Azure Portal からの確認結果になります。
Standard D4 v3 に変更されています。
Azure PowerShell で使用中の VM サイズを確認できます。以下の Azure PowerShell を実行します。
|
1 2 3 4 5 6 7 8 9 10 |
$size = (Get-AzureRmVM -ResourceGroupName "TestLab" -Name "labvm01").HardwareProfile.VMSize Get-AzureRmVMSize -location "eastus" | ?{ $_.name -eq $size } # 実行結果 警告: Get-AzureRmVM: A property of the output of this cmdlet will change in an upcoming breaking change release. Name NumberOfCores MemoryInMB MaxDataDiskCount OSDiskSizeInMB ResourceDiskSizeInMB ---- ------------- ---------- ---------------- -------------- -------------------- Standard_D4_v3 4 16384 8 1047552 102400 |
以上になります。
いかがでしょうか。
これで Azure PowerShell を使って、VM サイズを変更する方法が分かりました。
ただし、VM サイズを変更すると仮想マシンが再起動したり、その他いくつかの影響がありますので、事前に確認した上で実施する事をおすすめします。
では最後までお読みいただきありがとうございました!
おすすめの本はこちら ↓↓↓


